Entdecke unterschiedliche Bodenbeläge auf deinem eigenen Raumfoto.
Bild aus dem Originalartikel
Mit deinem eigenen Bild beginnen
Wähle dein Bild und die Einstellungen im Tool. Melde dich vor der Generierung an und prüfe Verfügbarkeit und Creditkosten, bevor du die Anfrage bestätigst.
Originalartikel vom 17. Februar 2026 auf Englisch. Historische Preis-, Zeit- und Verkaufsangaben sowie Bildunterschriften bleiben als Quelle erhalten; sie sind kein aktuelles Angebot oder zugesichertes Ergebnis. Aktuelle Tarife prüfen
Originalartikel lesen
How to Replace Flooring in Photos Without Renovation (AI Guide)
How to Replace Flooring in Photos Without Renovation
Transform outdated floors into modern finishes using AI technology—see the potential before spending thousands
# The $8,000 Problem Every Property Owner Faces
Flooring replacement ranks among the most expensive home improvements, with the National Association of Realtors reporting that homeowners spend an average of $7,800 to $12,000 on new flooring installation. For real estate professionals, this creates a unique challenge: how do you help clients visualize the potential of a property with dated carpeting or worn hardwood without recommending they invest thousands before listing?
The answer lies in digital floor replacement—a technology that's revolutionizing how we market properties and plan renovations. By 2026, AI-powered photo editing tools have become sophisticated enough to seamlessly replace flooring in photographs with photorealistic accuracy, allowing property owners, real estate agents, and interior designers to showcase transformation potential instantly.
## Why Digital Flooring Replacement Matters
Before diving into the technical how-to, consider the business case. Properties with updated flooring sell 23% faster and command 8-12% higher prices according to Zillow's 2026 Home Improvement Impact Report. However, actual renovation requires:
- 2-5 weeks of construction time
- Temporary relocation or staging delays
- Contractor coordination and potential delays
- Irreversible commitment to a single design choice
Digital replacement eliminates these barriers while providing:
**Instant visualization**: See 10 different flooring options in 10 minutes
**Zero risk testing**: Experiment with bold choices without commitment
**Marketing advantages**: Show transformation potential in listings
**Renovation planning**: Make confident decisions before purchasing materials
**Cost-effective staging**: Create aspirational listing photos for under $1
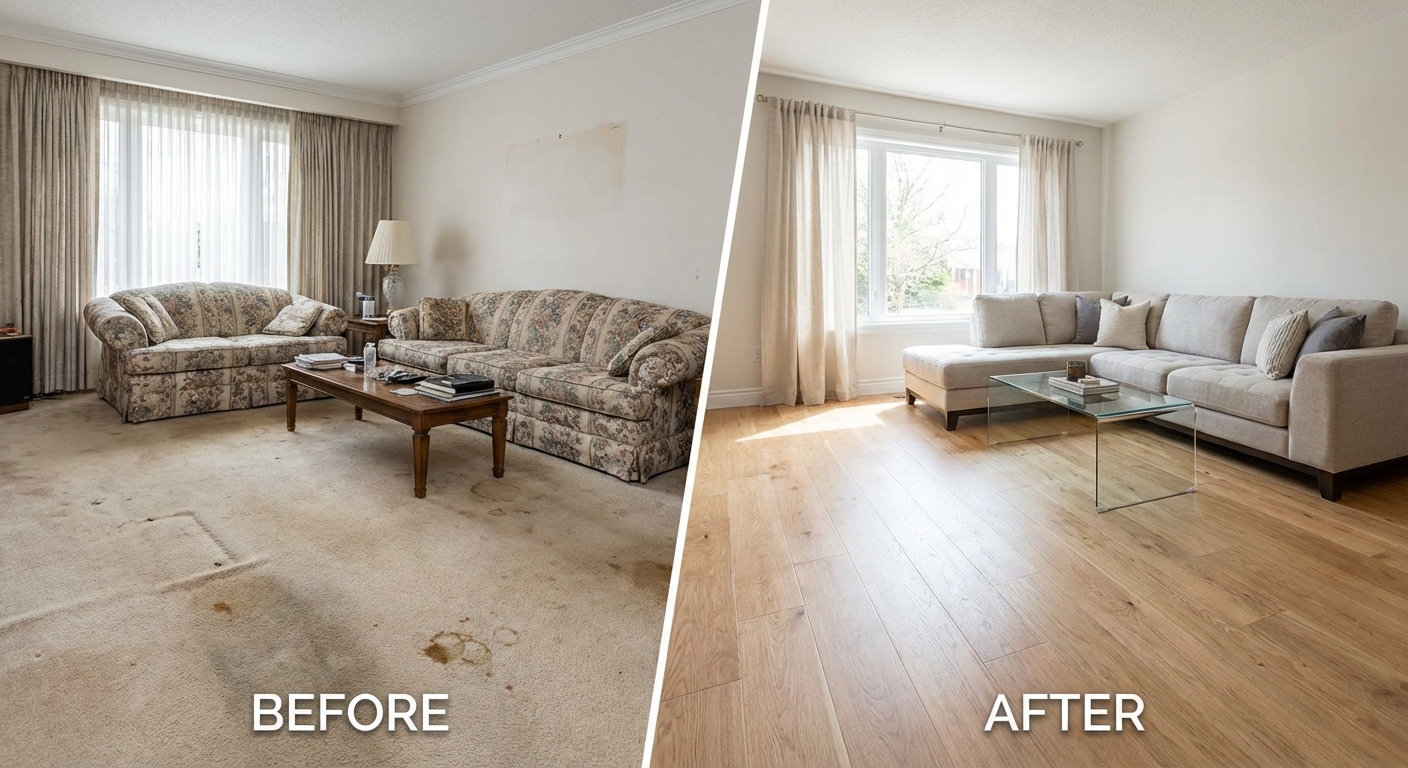
AI-powered flooring replacement transforms dated carpet into modern hardwood in seconds
# Understanding AI Flooring Replacement Technology
## How AI Recognizes and Replaces Floors
Modern AI flooring tools use computer vision algorithms trained on millions of interior photographs. The process involves three core technologies:
**Semantic segmentation**: The AI identifies floor boundaries by recognizing where walls meet floors, furniture placement, and spatial perspective. Advanced models can distinguish between floors and similar horizontal surfaces like rugs or low furniture.
**Perspective mapping**: The algorithm calculates the room's vanishing points and perspective grid to ensure replacement flooring follows the correct angles and dimensions. This prevents the "floating floor" effect common in amateur photo editing.
**Material synthesis**: Neural networks generate realistic wood grain patterns, tile arrangements, or carpet textures that match proper scaling and lighting conditions of the original photograph.
## Current Capabilities and Limitations
As of 2026, AI flooring replacement excels at:
- **Standard room layouts**: Rectangular rooms with clear floor visibility achieve 95%+ photorealistic results
- **Common materials**: Hardwood, laminate, tile, and carpet replacements with extensive training data
- **Good lighting**: Well-lit photographs with minimal shadows produce better results
- **Uncluttered spaces**: Rooms with visible floor space (at least 60% visible) work best
Challenges remain with:
- **Extreme angles**: Fish-eye lenses or dramatic perspective shots may show distortion
- **Heavy obstruction**: Rooms where furniture covers 80%+ of flooring
- **Complex patterns**: Intricate mosaic or custom inlay patterns require manual refinement
- **Reflective surfaces**: Highly polished floors with complex reflections need additional processing
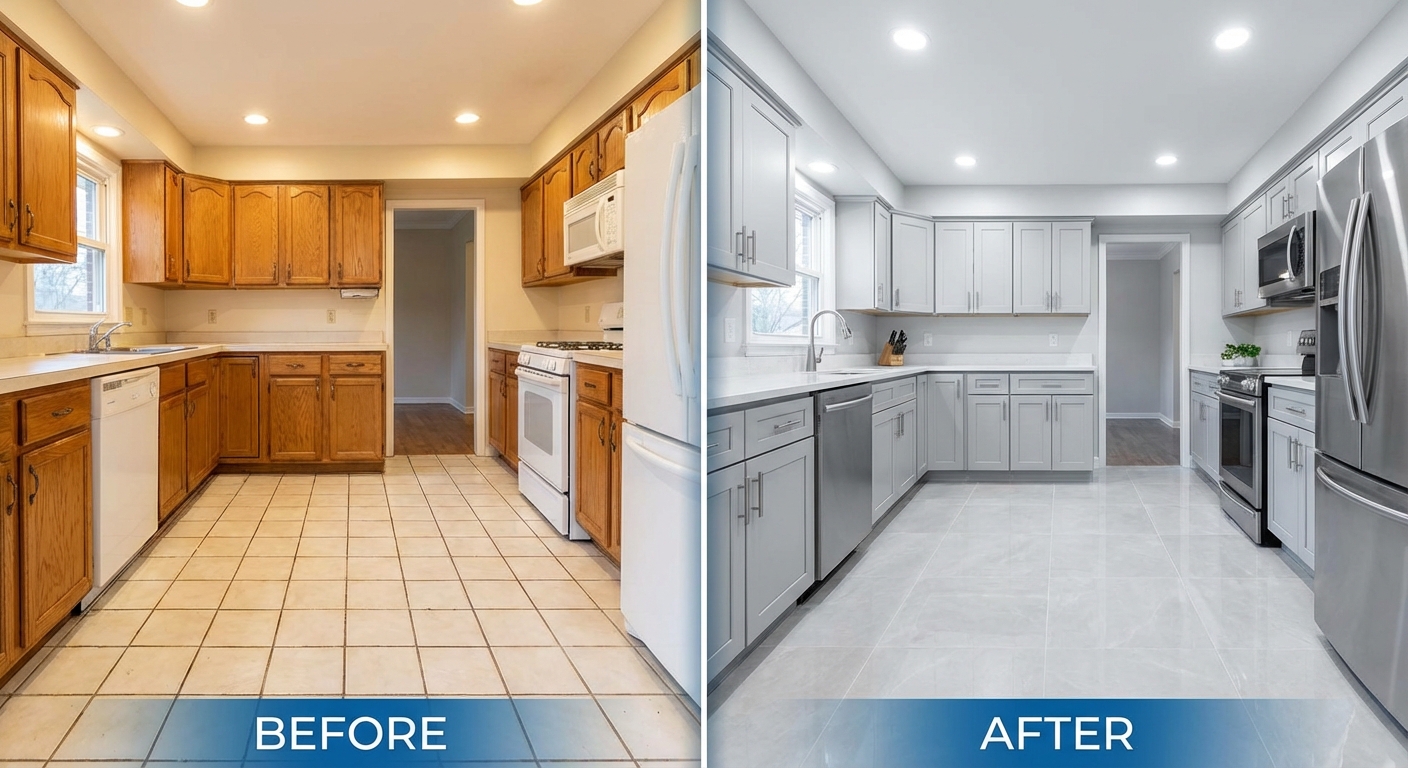
Kitchen flooring transformation from dated ceramic to contemporary large-format tile
# Step-by-Step Guide: Replacing Flooring in Photos
## Step 1: Choose the Right Source Photo
Your results depend heavily on photo quality. Follow these specifications:
**Resolution requirements**: Minimum 2000 x 1500 pixels for professional results. Higher resolution (4K+) allows for larger print formats and detailed zoom views.
**Lighting standards**: Take photos during daylight hours with supplemental lighting if needed. Avoid harsh direct sunlight that creates extreme shadows. Overcast days provide ideal even lighting.
**Camera positioning**: Shoot from approximately 5 feet height (chest level) to minimize perspective distortion. Keep the camera level—tilted angles complicate AI processing.
**Room preparation**: Remove small rugs, floor clutter, and movable items that might confuse floor boundaries. The more continuous floor space visible, the better the AI performs.
## Step 2: Select Your AI Tool
Multiple platforms offer flooring replacement capabilities with varying approaches:
**Specialized flooring tools**: Dedicated solutions like PropStage.ai's Flooring Swap Tool provide predefined material options (oak hardwood, marble, gray tile, etc.) optimized specifically for floor replacement. These typically cost $0.10-$0.50 per image and deliver results in 30-60 seconds.
**General AI editors**: Platforms using describe-to-edit functionality allow custom requests ("replace carpet with reclaimed barnwood flooring"). These offer more flexibility but may require multiple attempts for precise results.
**Photoshop AI plugins**: Adobe's Generative Fill and similar plugins integrate flooring replacement into existing workflows but require manual masking and layer management.
## Step 3: Define Floor Boundaries (If Required)
Some tools automatically detect floors, while others require manual selection:
**Automatic detection**: Most modern tools identify floors automatically. Review the AI's selection—it should include all visible flooring while excluding baseboards, thresholds, and furniture.
**Manual refinement**: Use brush or lasso tools to add missed sections (like areas under glass tables) or exclude incorrectly included elements (like dark rugs mistaken for flooring).
**Edge precision**: Pay special attention to boundaries where floor meets walls, cabinets, or furniture. Clean edges prevent obvious editing artifacts.
## Step 4: Choose Replacement Material
Consider your audience and property type:
**For luxury listings**: Dark walnut hardwood, marble, or wide-plank oak convey premium quality
**For family homes**: Durable laminate, luxury vinyl plank, or medium-tone hardwood suggest practical elegance
**For modern spaces**: Polished concrete, large-format tile, or blonde Scandinavian wood match contemporary aesthetics
**For traditional homes**: Classic oak, cherry hardwood, or traditional tile patterns maintain architectural consistency
## Step 5: Generate and Review Results
After processing (typically 30-90 seconds), evaluate:
**Perspective accuracy**: Do floor planks or tiles follow the room's perspective lines? Check vanishing points and alignment.
**Lighting consistency**: Does the new floor reflect light sources naturally? Shadows should match the room's lighting.
**Scale appropriateness**: Are wood planks or tiles sized realistically for the room dimensions?
**Edge quality**: Examine transitions between floor and walls, furniture legs, and doorways for smooth blending.
## Step 6: Refine and Export
Most tools allow adjustments:
**Material intensity**: Adjust the strength of the replacement (80-100% typically looks most realistic)
**Color temperature**: Modify warmth/coolness to match room lighting
**Finish level**: Select matte, satin, or glossy finishes appropriate to the material
**Detail sharpness**: Balance between crisp detail and natural photographic softness
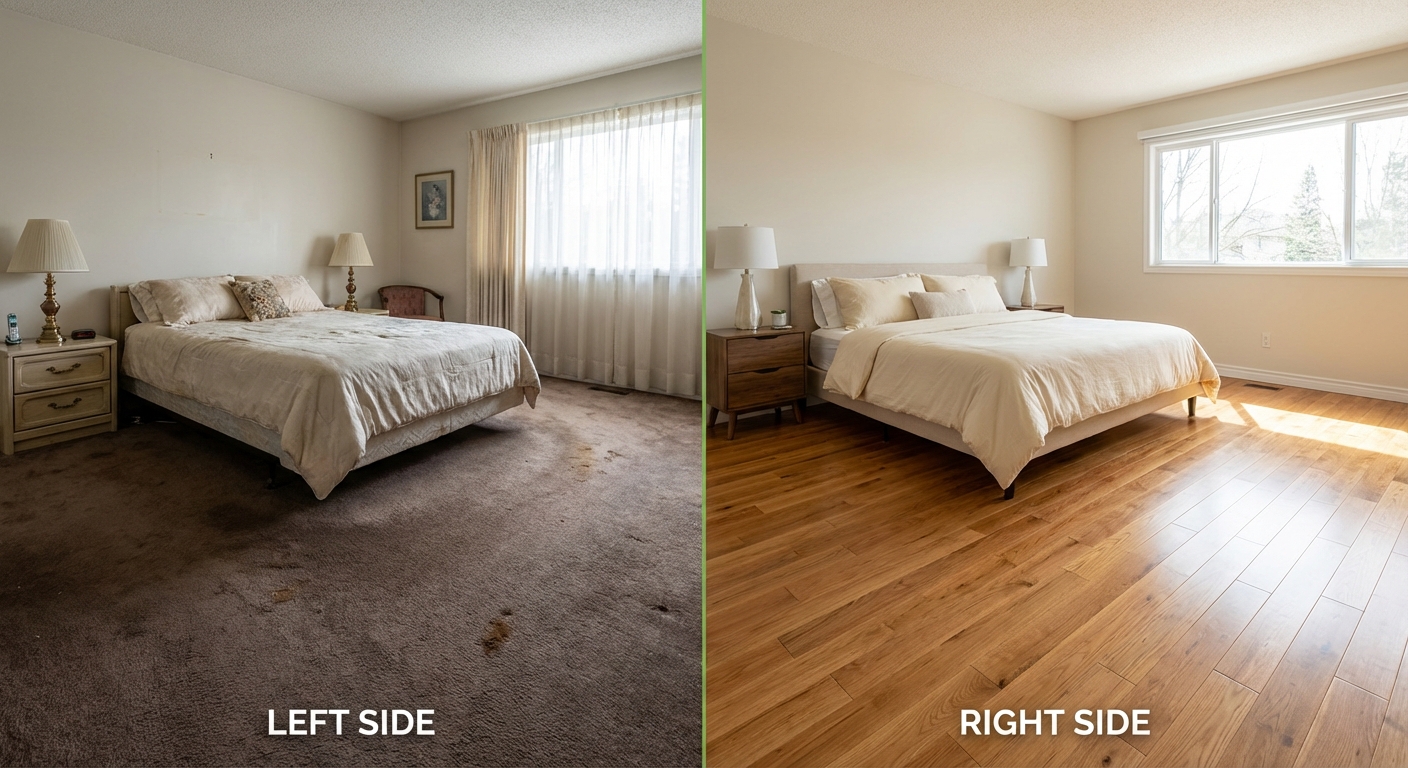
Bedroom transformation demonstrating how AI flooring replacement updates dated carpet
# Advanced Techniques for Professional Results
## Matching Existing Home Character
The best digital flooring respects a property's architectural style:
**Victorian and historic homes**: Choose quarter-sawn oak, walnut parquet, or traditional tile patterns that existed during the period. Avoid ultra-modern materials that clash with original moldings and details.
**Mid-century modern**: Opt for light to medium woods with horizontal grain patterns, terrazzo, or natural stone that complement clean lines and open layouts.
**Contemporary spaces**: Consider polished concrete, large-format rectified tile, or wide-plank engineered wood with minimal grain variation for sleek, minimalist aesthetics.
## Handling Difficult Lighting Situations
Poor lighting creates common challenges:
**Backlighting from windows**: When bright windows create dark floor areas, pre-process photos with exposure balancing before flooring replacement. Increase shadow detail by 20-30% to provide the AI with more floor information.
**Mixed color temperatures**: Rooms with both daylight and incandescent lighting show color shifts. Choose flooring materials in neutral tones (gray-brown rather than extreme warm or cool) that adapt to mixed lighting.
**Evening or night photography**: Artificial lighting creates yellow/orange casts. Select replacement flooring in the same temperature range, or color-correct the entire image after flooring replacement to maintain consistency.
## Creating Multiple Options for Client Presentations
Real estate professionals and designers should generate 3-5 variations:
**Conservative option**: Safe, neutral flooring that appeals to the broadest buyer demographic
**Trendy option**: Current design-forward choice showcasing modern updates
**Luxury upgrade**: Premium materials demonstrating highest-value transformation
**Budget-friendly alternative**: Attractive but economical solution showing affordable potential
**Client-specific preference**: Based on stated taste ("they mentioned loving light, Scandinavian interiors")
## Combining with Other Virtual Improvements
Flooring rarely exists in isolation. Stack transformations for comprehensive visualization:
1. **Start with decluttering**: Remove personal items and clutter first
2. **Update flooring**: Replace floors as the foundational change
3. **Adjust wall colors**: Coordinate paint colors with new flooring
4. **Add or update staging**: Place furniture that complements the updated aesthetic
5. **Enhance lighting**: Apply golden hour or improved lighting for final polish
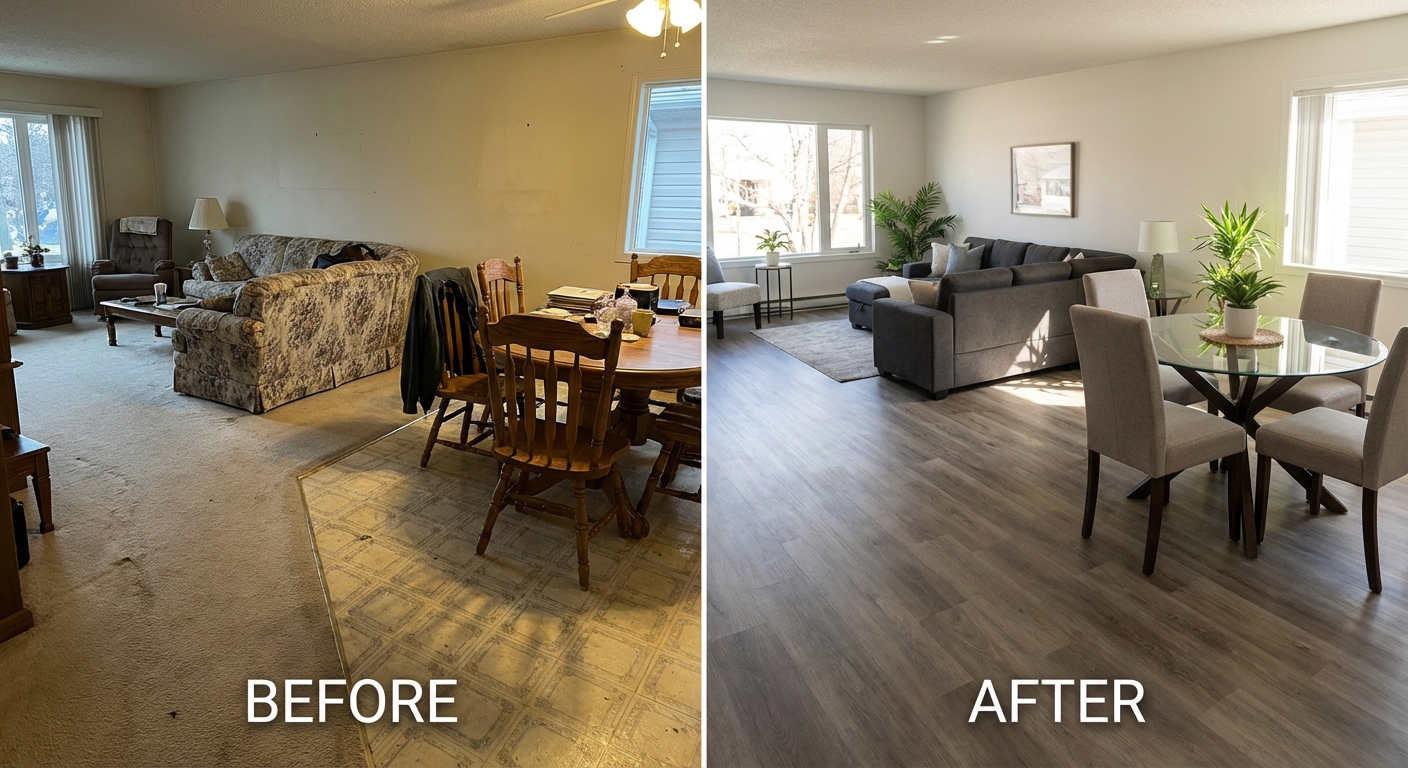
Creating visual flow by unifying mismatched flooring across connected spaces
# Common Mistakes and How to Avoid Them
## Mistake #1: Choosing Unrealistic Materials
**The error**: Selecting ultra-premium marble or exotic hardwood for a modest starter home, creating cognitive dissonance with the property's price point and overall finish level.
**The fix**: Match flooring quality to the home's market segment. A $250,000 suburban home should show attractive but realistic laminate or standard oak, not hand-scraped reclaimed teak.
## Mistake #2: Ignoring Scale and Proportion
**The error**: Applying 12-inch wide plank flooring to a small room, or tiny mosaic tile to a large open space, creating visually inappropriate scaling.
**The fix**: Follow design rules—large spaces can handle wider planks (8-12 inches) or larger tiles (18-24 inches), while smaller rooms need proportionally smaller elements (3-5 inch planks, 12-inch tiles).
## Mistake #3: Mismatched Reflectivity
**The error**: Replacing matte carpet with high-gloss flooring without adjusting reflections, resulting in unnaturally shiny floors that don't reflect room elements.
**The fix**: Choose finish levels that match the room's lighting. Matte and satin finishes work for most applications. Reserve high-gloss only for formal spaces with sophisticated lighting.
## Mistake #4: Neglecting Transitions
**The error**: Showing new flooring that abruptly ends at doorways or transitions without considering how it meets adjacent rooms' flooring.
**The fix**: When replacing flooring in photos, maintain awareness of what's visible beyond doorways. Either process those spaces too, or choose transitional materials that logically connect.
## Mistake #5: Over-Processing
**The error**: Running the AI multiple times or at excessive strength, creating artificial-looking results with unrealistic perfection or visible artifacts.
**The fix**: Accept that 90% photorealistic beats 100% artificial. Subtle imperfections (slight grain variation, natural light gradients) actually increase believability.
# Real-World Applications and Use Cases
## For Real Estate Agents
**Pre-listing consultations**: Show sellers the visual impact of flooring updates without requiring actual renovation. "Here's your home with updated flooring—this transformation could add $15,000-$25,000 to your sale price."
**Listing photography enhancement**: Create alternate photo sets showcasing potential. Include both "as-is" photos (for transparency) and "with updated flooring" versions to help buyers envision possibilities.
**Investor presentations**: When marketing fixer-uppers or dated properties, demonstrate transformation potential to investors calculating renovation ROI.
## For Interior Designers
**Client proposal development**: Generate multiple flooring options during the design phase before material purchases. "Here are five flooring directions we could take this space."
**Material coordination**: Test how different flooring choices interact with selected furniture, cabinetry, and paint colors before finalizing specifications.
**Budget scenario planning**: Show clients the visual difference between budget laminate, mid-range engineered hardwood, and premium solid wood to justify investment levels.
## For Property Managers and Landlords
**Renovation planning**: Prioritize which units need actual flooring replacement by visualizing updates and comparing impact.
**Tenant marketing**: Create aspirational listing photos for rental properties showing upgrade potential without immediate capital investment.
**Portfolio consistency**: Maintain brand consistency across property portfolios by visualizing standardized flooring choices.
## For Homeowners Planning Renovations
**Decision confidence**: Eliminate the anxiety of choosing flooring by seeing real photos of your actual rooms with different options.
**Partner agreement**: Resolve spousal disagreements by viewing multiple options in your actual space rather than abstract samples.
**Staging before selling**: Test whether flooring replacement is necessary or if other improvements deliver better ROI for your specific property.
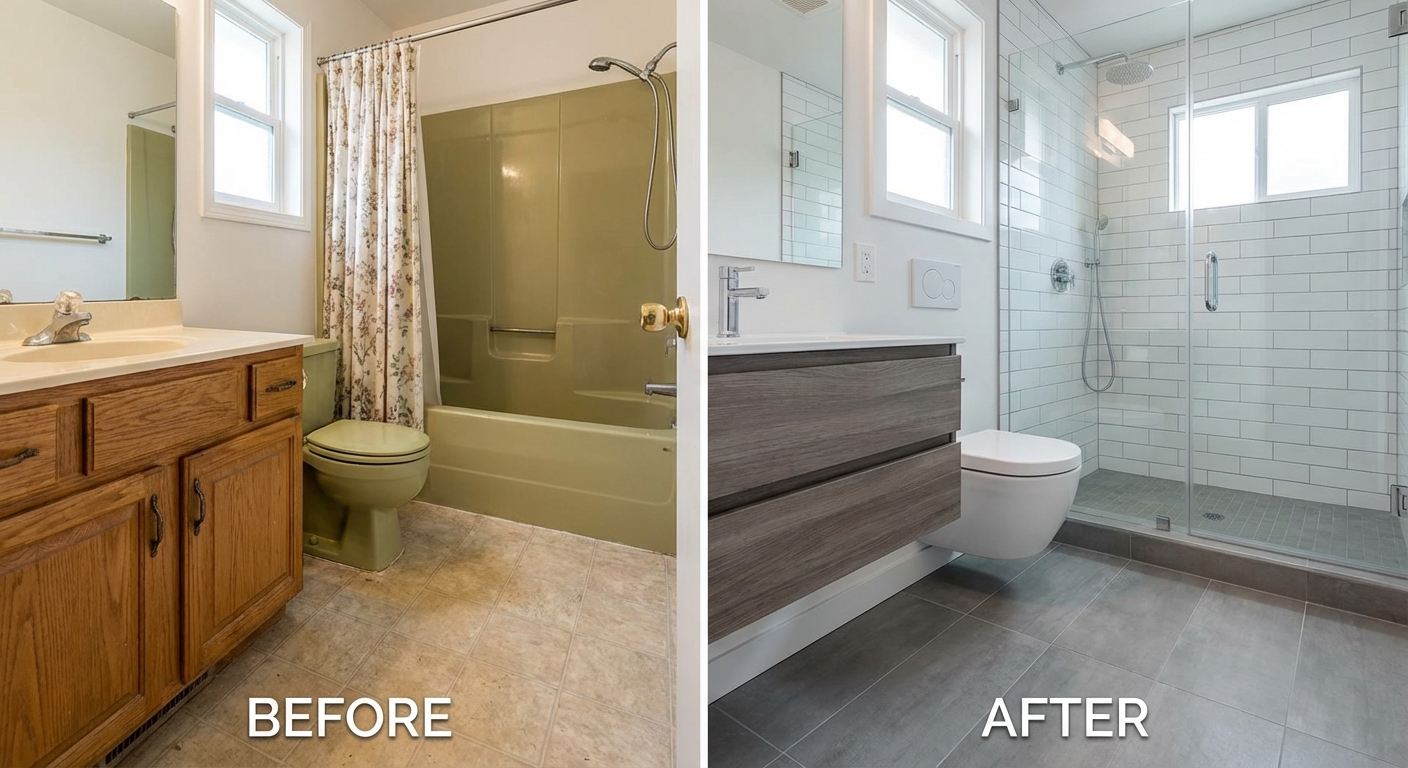
Bathroom flooring transformation demonstrating impact of modern tile replacement
# Cost Analysis: Digital vs. Physical Flooring Replacement
## Physical Flooring Replacement Costs (2026)
Understanding actual renovation costs provides context for digital alternatives:
**Carpet removal and hardwood installation**: $8-$15 per square foot (materials + labor)
- 300 sq ft room: $2,400-$4,500
- 1,500 sq ft home: $12,000-$22,500
**Luxury vinyl plank installation**: $4-$8 per square foot
- 300 sq ft room: $1,200-$2,400
- 1,500 sq ft home: $6,000-$12,000
**Tile installation**: $10-$20 per square foot (depending on material)
- 300 sq ft room: $3,000-$6,000
- 1,500 sq ft home: $15,000-$30,000
**Additional costs**: Furniture moving ($200-$500), disposal ($150-$400), interim housing ($1,000-$3,000 for major projects)
## Digital Flooring Replacement Costs
**Per-image pricing**: $0.10-$2.00 per photo depending on platform and quality tier
- 10-photo listing: $1-$20 total
- 50-photo comprehensive visualization: $5-$100 total
**Subscription models**: $20-$100 monthly for unlimited processing (professional tier platforms)
**Time investment**: 5-15 minutes per photo including selection, processing, and review
## When Physical Renovation Makes Sense
Digital replacement isn't always the final answer:
**Properties requiring actual renovation**: If flooring is damaged, unsanitary, or non-functional, physical replacement remains necessary. Use digital tools for planning, not avoidance.
**High-end luxury market**: Buyers at premium price points expect actual renovations. Digital visualization serves planning purposes but shouldn't replace actual work.
**Personal long-term residence**: Homeowners living in a property long-term should invest in actual materials they'll enjoy daily.
**Structural issues**: When subfloors require repair or leveling, digital solutions won't address underlying problems.
## Optimal Hybrid Approach
1. **Visualize first**: Use digital tools to test multiple options ($10-$50)
2. **Make confident decisions**: Select materials based on seeing them in your actual space
3. **Plan renovation**: Armed with clear vision, obtain accurate contractor quotes
4. **Execute strategically**: Complete physical renovation with confidence
5. **Document transformation**: Photograph actual results for portfolio/resale
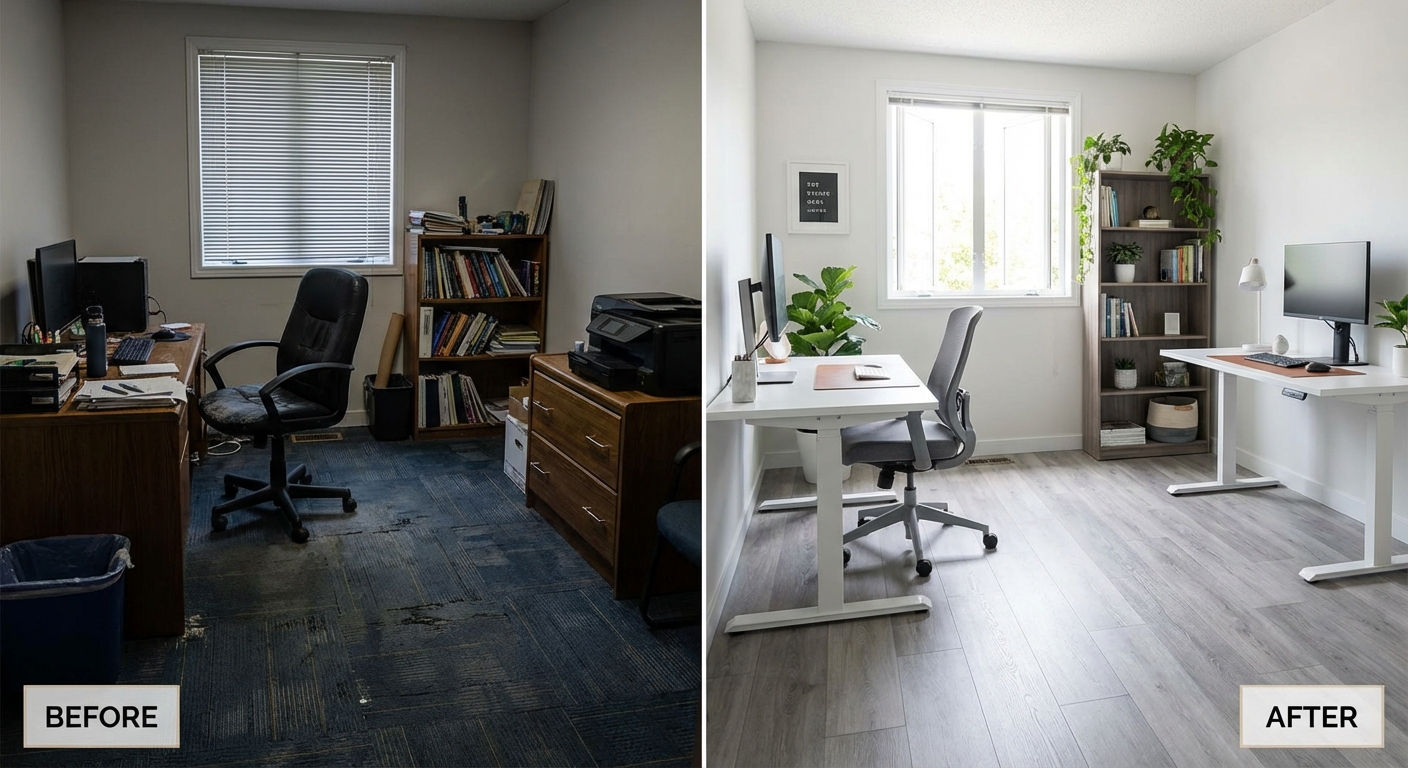
Office space flooring upgrade showing carpet tile replaced with contemporary laminate
# Expert Tips for Maximum Impact
## Tip #1: Photograph in Optimal Conditions
Success starts before AI processing. Schedule photography during 10am-2pm for maximum natural light. Open all blinds and curtains, turn on all interior lights, and ensure the floor is completely clean—dust and debris will be magnified in transformed images.
## Tip #2: Process Related Spaces Together
When replacing flooring in open-concept homes, process all visible connected spaces simultaneously to maintain consistency. A living room that flows into a dining area and kitchen should show unified flooring throughout for realistic results.
## Tip #3: Create Comparison Galleries
Don't show only the transformed image. Create side-by-side or slider comparisons that allow viewers to appreciate the before/after impact. This transparency builds trust and dramatically illustrates transformation potential.
## Tip #4: Match Wood Tones to Fixed Elements
If a room has wood cabinets, trim, or built-ins that won't be replaced, choose flooring in complementary (not matching) tones. Exact matches look intentional; complementary tones create sophisticated coordination.
## Tip #5: Consider Regional Preferences
Flooring trends vary by geography. Coastal areas favor light, weathered woods and tile. Northern regions prefer warm, rich hardwoods. Southwestern markets embrace terra cotta and stone. Research local preferences before selecting replacement materials.
## Tip #6: Preserve Original Resolution
Always work from highest-resolution source files and export at maximum quality. Compression artifacts become more visible after AI processing. Maintain quality for printing large marketing materials.
## Tip #7: Disclose Digital Enhancement
Ethically and legally, disclose when listing photos show digitally altered flooring. Use captions like "Flooring shown digitally enhanced to demonstrate potential" to maintain transparency while showcasing possibilities.
## Tip #8: Test Print Quality
Before committing to professional printing, order test prints of AI-processed images. Subtle artifacts invisible on screens may appear in print. Adjust processing settings if needed.
# The Future of Digital Property Visualization
As AI technology continues advancing, flooring replacement represents just one element of comprehensive virtual renovation capabilities. By 2026, integrated platforms allow complete property transformations—flooring, walls, fixtures, furnishings—in minutes rather than weeks.
The most successful real estate professionals, designers, and property investors embrace these tools not as replacements for actual renovation but as powerful planning and marketing instruments. They reduce uncertainty, accelerate decision-making, and create compelling visual narratives about property potential.
Whether you're preparing a listing, planning a renovation, or helping clients envision possibilities, digital flooring replacement delivers professional results at a fraction of traditional photography or rendering costs. The technology has matured beyond experimental novelty into a practical, reliable tool that produces photorealistic results indistinguishable from actual renovations in most viewing contexts.
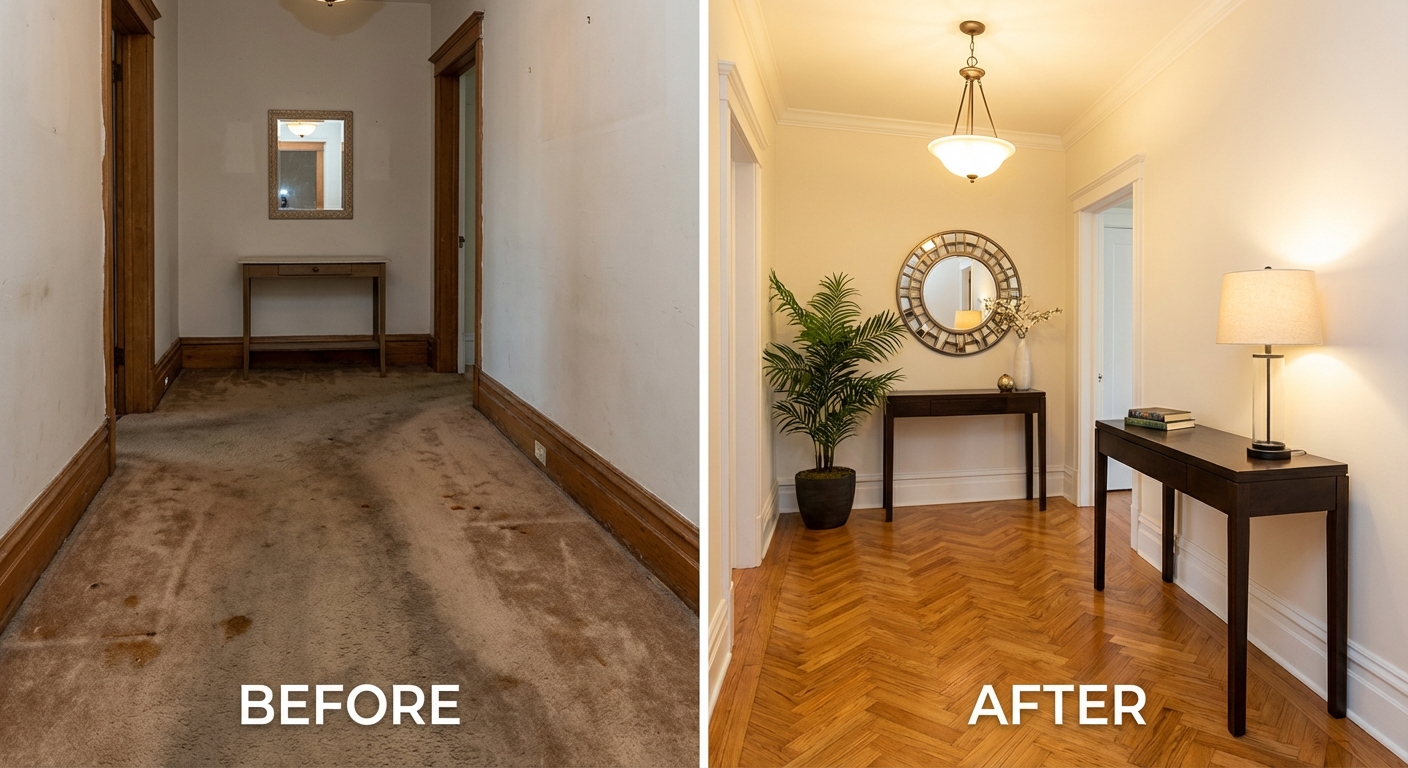
Dramatic entryway transformation with herringbone hardwood flooring replacement
# Getting Started with Digital Flooring Replacement
Ready to transform your property photos? Follow this quick-start process:
**Step 1**: Gather high-resolution photos of rooms where you want to visualize flooring changes. Ensure good lighting and clear floor visibility.
**Step 2**: Choose a specialized AI tool designed specifically for flooring replacement. These deliver better results than general-purpose editors for this specific application.
**Step 3**: Select replacement materials that match your property's market segment and architectural style. When in doubt, opt for neutral, broadly appealing options.
**Step 4**: Process images and review results carefully for perspective accuracy, lighting consistency, and realistic scale.
**Step 5**: Create side-by-side comparisons or image sliders to showcase transformation potential effectively.
**Step 6**: Apply appropriate disclosure when using transformed images in marketing materials to maintain ethical standards.
Digital flooring replacement represents one of the highest-value applications of AI in real estate and design. For minimal investment, you gain powerful visualization capabilities that inform better decisions, accelerate sales, and communicate property potential with unprecedented clarity.